
A simple tutorial on How to Can Tomatoes with a water bath or steam canner, so you can enjoy fresh summer tomatoes all year long.
 How to Can Tomatoes for the best flavor upgrade, and easiest pantry staple!
All you need is tomatoes, lemon juice and salt, and you can preserve your high-quality tomatoes to enjoy all year long! I love canning diced tomatoes in pint jars to use in place of a 14.5 oz can of diced tomatoes, but you could also leave the tomatoes whole. Use a steam canner (which I think is the easiest), or a water-bath canner.
Then you can use your canned tomatoes recipe in homemade chili, lasagna, pastalaya, slow cooker chicken tikka masala, Taco Soup, lentil soup, or any recipe that uses them! And if you love canning, try my other canning recipes, like Canned Peaches, Applesauce and Strawberry Jam!
Equipment needed:
- A large steam canner or water-bath canner with racks (for processing the jars)
- 6 quart jars, sterilized
- New lids and rings
How to Can Tomatoes:
Sterilize Canning Jars and prep lids: You run jars through a dishwasher cycle on high heat, or wash jars in hot soapy water, and then sterilize jars by placing them in a boiling water canner filled with water and boil for 10 minutes.
Place lids (not rings) in a bowl and pour boiling water over them. Let them sit until ready to use (this softens the sealing compound).
Blanch tomatoes: Bring a large pot of water to boil. Add tomatoes and blanch for 1–2 minutes, just until the skins begin to split.Transfer tomatoes immediately to a bowl of ice water to cool quickly. Peel skins off with your hands or a paring knife.
Fill Jars: Chop peeled tomatoes (or leave whole/halved if you prefer) and pack them into hot, sterilized jars. Leave ½ inch headspace at the top.
To ensure proper acidity and safe preservation:
- Add to each pint jar: 1 tablespoon bottled lemon juice (or ¼ teaspoon citric acid).
- Add to each quart jar: 2 tablespoons bottled lemon juice (or ½ teaspoon citric acid).
- Optional: Add ½ teaspoon salt per pint (1 teaspoon per quart) for flavor.
Wipe jar rims clean with a damp paper towel. Place lids on and screw bands on until fingertip tight.
Process:
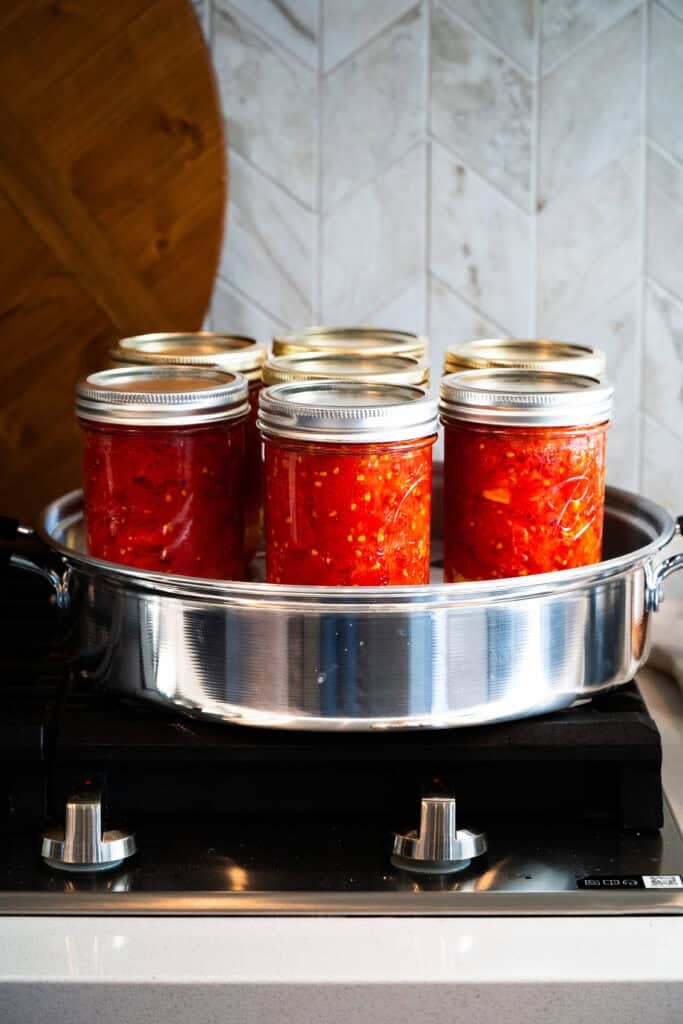
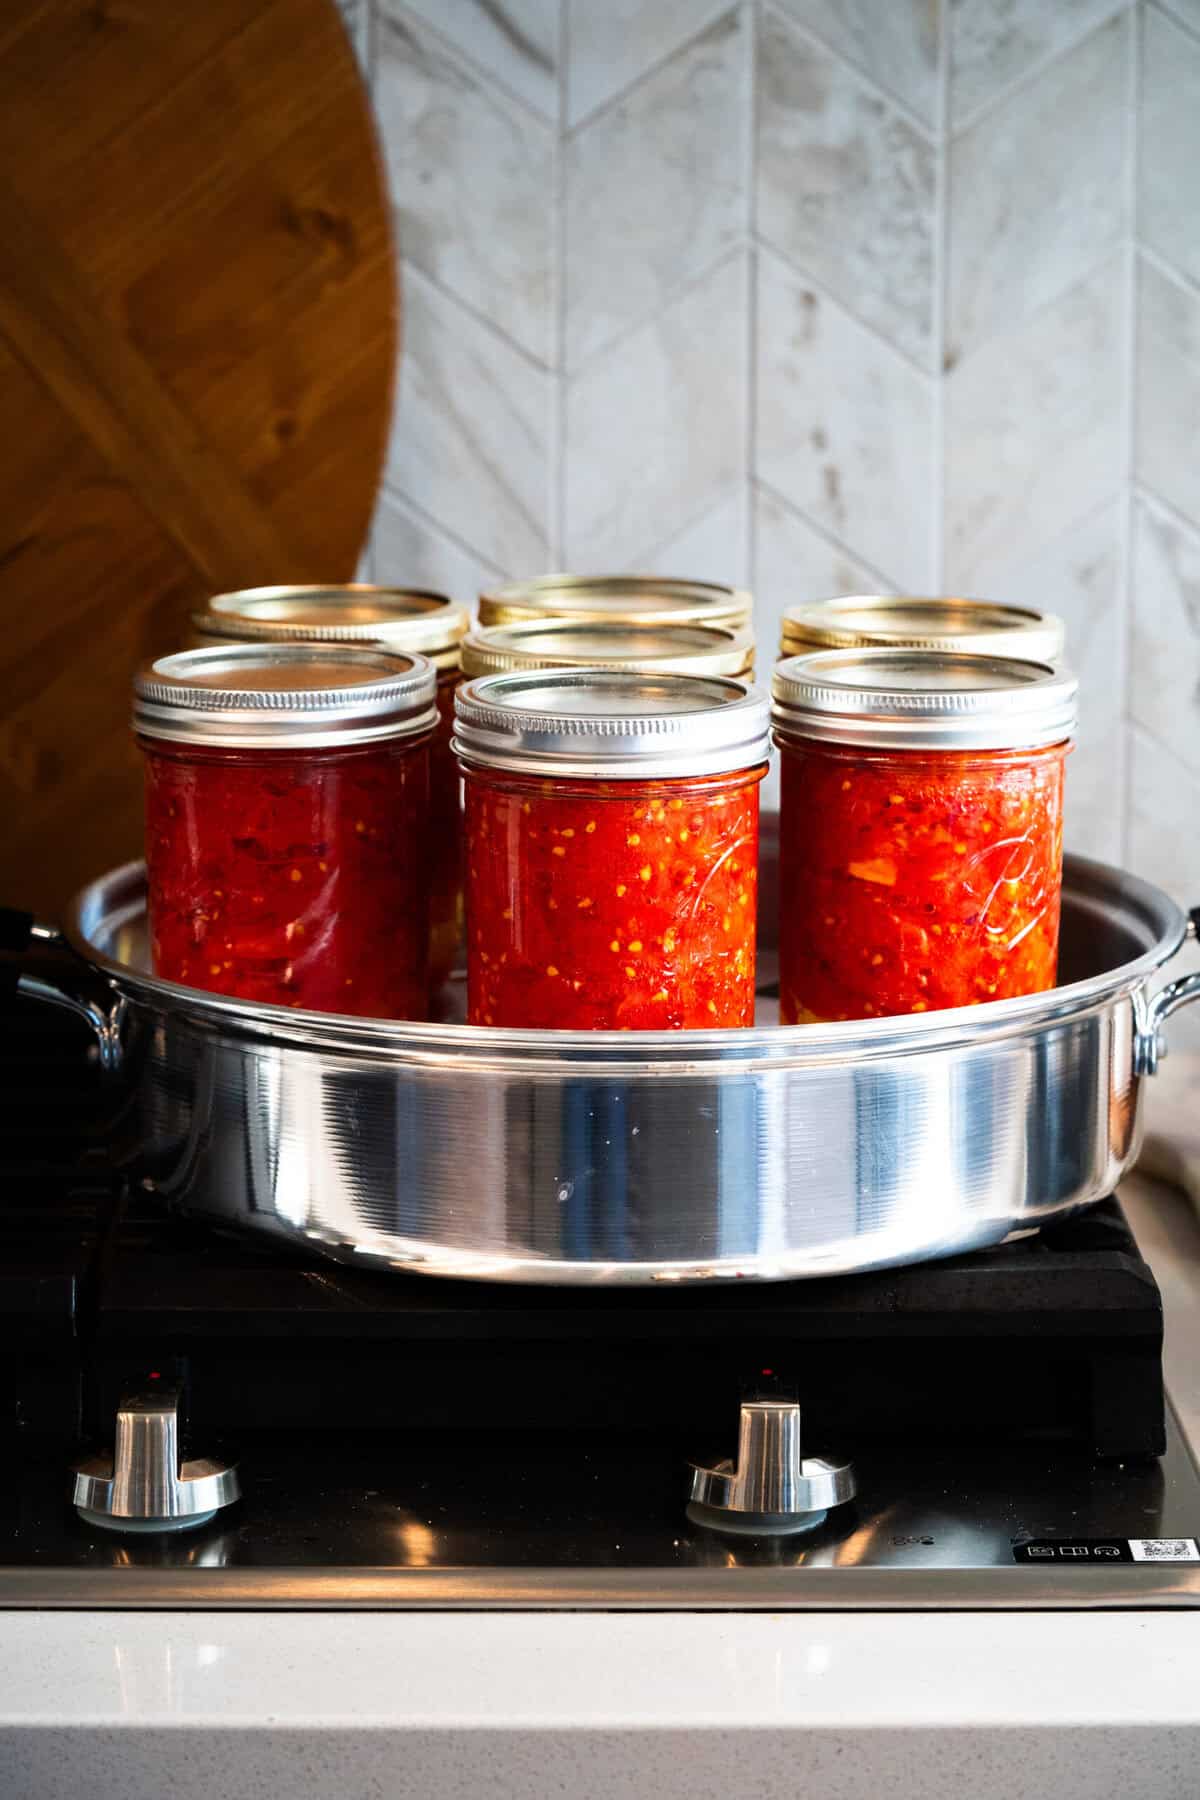
For a Steam Canner: Add water to the base (just below the rack). Place jars on the rack (usually up to 7). Cover with the lid and heat on medium-high until a steady stream of steam escapes.
For a Water-Bath Canner: Place filled jars on the rack inside the canner. Cover jars with at least 1–2 inches of boiling water. Cover with lid and bring back to a gentle, rolling boil. Begin timing once water is boiling.
Processing Times:
- Pints: 40 minutes (sea level–1,000 ft)
- Quarts: 45 minutes (sea level–1,000 ft)
Adjust for Elevation:
- 1,001–3,000 ft: add 5 minutes
- 3,001–6,000 ft: add 10 minutes
- 6,001–8,000 ft: add 15 minutes
- 8,001–10,000 ft: add 20 minutes
Remove and Rest: Carefully remove jars with a jar lifter and place on a towel-lined counter. Do not tilt jars. Let them sit undisturbed for 12–24 hours. Check seals: lids should be concave and not flex when pressed. If a jar did not seal, refrigerate it and use within a week.
Store: Label sealed jars with the date and store in a cool, dark place. Properly sealed jars of canned tomatoes will last for 12–18 months (at best quality), and are often safe eating after even longer than that.
How do I know if my canned tomatoes are safe to eat?
Always make sure your mason jars do not show signs of leaking or rusting. Press down on the center of the lid: it should not pop back. If it sits flat it is safe, but if it pops back, it has not.
Follow me for more great recipes
Canning Tomatoes
Equipment
-
jar rings, and unused canning lids
Ingredients
- 14 lbs Roma tomatoes* (or other low-moisture tomatoes)
- Lemon juice
- Salt
Instructions
-
Sterilize Canning Jars and prep lids: You can run jars through a dishwasher cycle on high heat, or wash jars in hot soapy water, and then sterilize jars by placing them in a boiling water canner filled with water and boil for 10 minutes. Place lids (not rings) in a bowl and pour boiling water over them. Let them sit until ready to use (this softens the sealing compound).
-
Blanch tomatoes: Bring a large pot of water to boil.Add tomatoes and blanch for 1–2 minutes. Transfer tomatoes immediately to a bowl of ice water to cool quickly. Peel skins off with your hands or a paring knife.14 lbs Roma tomatoes* (or other low-moisture tomatoes)
-
Fill Jars: Chop peeled tomatoes (or leave whole/halved if you prefer) and pack them into hot, sterilized jars. Leave ½ inch head space at the top. For pint jars add 1 tablespoon bottled lemon juice (or ¼ teaspoon citric acid) and ½ teaspoon salt. For quart jars: 2 tablespoons bottled lemon juice (or ½ teaspoon citric acid). and 1 teaspoon salt.Lemon juice, Salt
-
Apply lids: Run a small spatula along the inside edges of the jars to remove an air bubbles. Wipe jar rims clean, place lids on and screw bands on (not too tight).
Process Jars:
-
For a Steam Canner:Add water to the base (just below the rack). Place jars on the rack (usually upto 7). Cover with the lid and heat on medium-high until a steady stream ofsteam escapes.
-
For a Water-Bath Canner:Place filled jars on the rack inside the canner. Cover jars with at least 1–2inches of boiling water. Cover with lid and bring back to a gentle,rolling boil. Begin timing once water is boiling.
-
Processing Times: Pints: 40 minutes (sea level–1,000 ft) Quarts: 45 minutes (sea level–1,000 ft) Adjust for Elevation: 1,001–3,000 ft: add 5 minutes 3,001–6,000 ft: add 10 minutes 6,001–8,000 ft: add 15 minutes 8,001–10,000 ft: add 20 minutes
-
Remove and Rest: Carefully remove jars with a jar lifter and place on a towel-lined counter. Do not tilt jars. Let them sit undisturbed for 12–24 hours. Check seals: lids should be concave and not flex when pressed. If a jar did not seal, refrigerate it and use within a week.
-
Store: Label sealed jars with the date and store in a cool, dark place. Properly sealed jars of canned tomatoes will last for 12–18months (at best quality), and are often safe eating after even longer than that.
Notes
Follow Me
I originally shared this recipe July 2013. Updated May 2020 and September 2025 with new photos and clearer instructions.
from Tastes Better From Scratch https://ift.tt/GAPYmUI subscriber.email_address }}